
- Configuration:
- Access your admin dashboard.
- Scroll to the bottom of the page under configuraton
- Click on school profile.
- Click on the Academic Report Design Tab
- Select Score Type to enable SBA Assessment or leave default to use simplified scores module
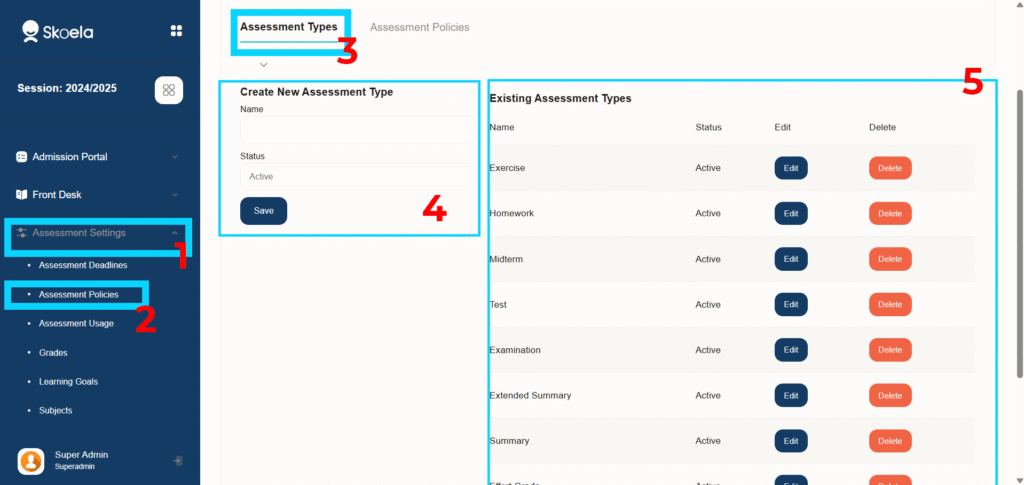
- Assessment Policies:
- Login to your dashboard
- Under Assessment Settings, click on “Assessment Policies”
- On the page Leave the assessment type listed as it is
- Click on the assessment policies
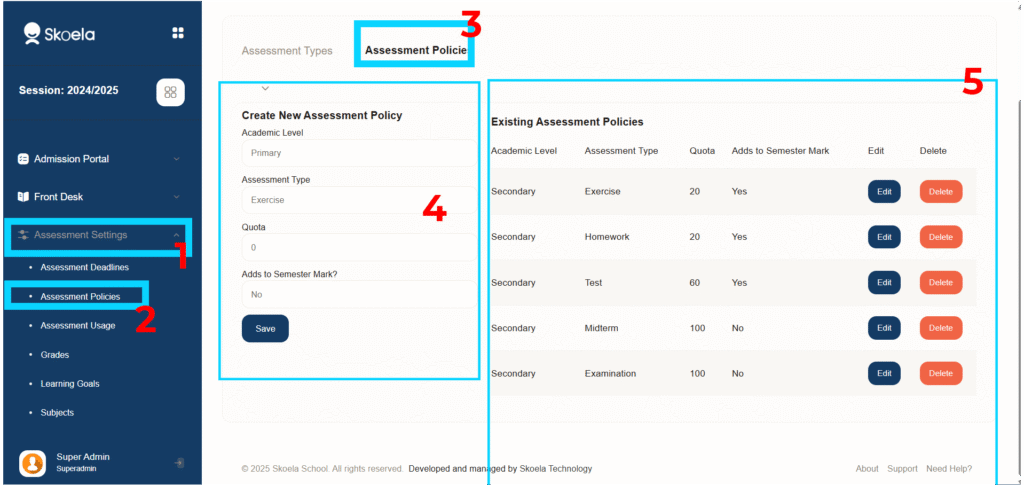
- Use the form on your left to set class level and the weight per each assessment type
- Select yes if you want to include the assessment in your continuous assessment calculation
- Select no to let it stand alone
- Make the necessary changes and click “Save”.
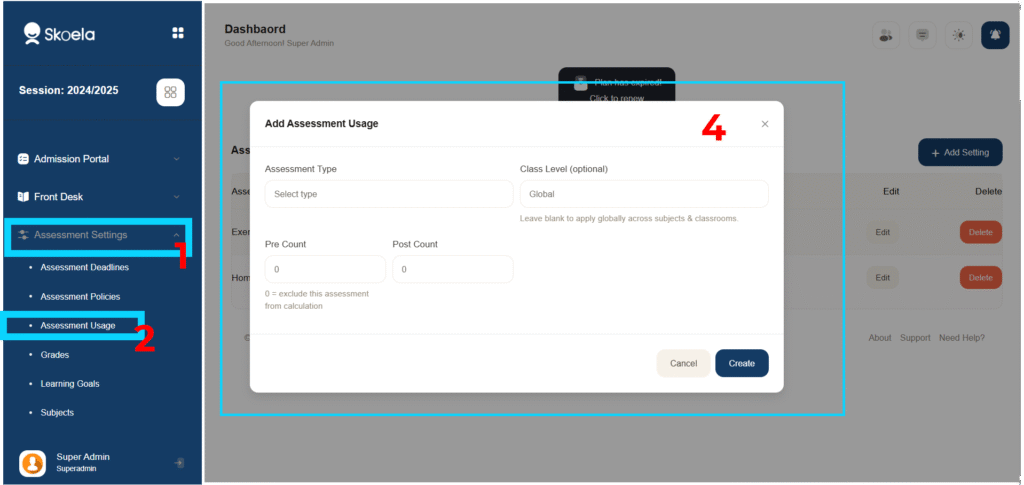
- Asseement Usage Configuration:
- Select Assessment Type.
- Select the class level or leave blank to apply to all classes.
- Pre Count(before midterm how many records for assement type selected, eg, 2 excercise(assessment type)
- Pos Count(after midterm how many records)
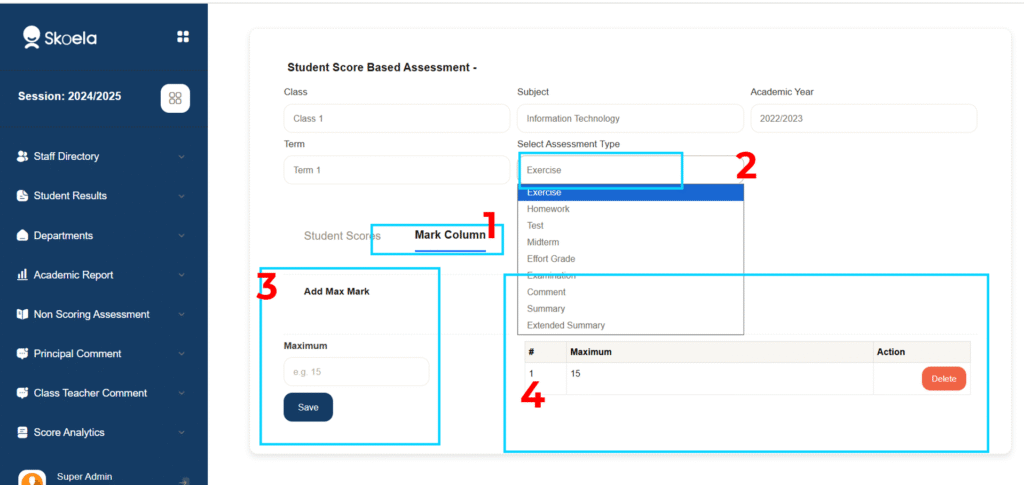
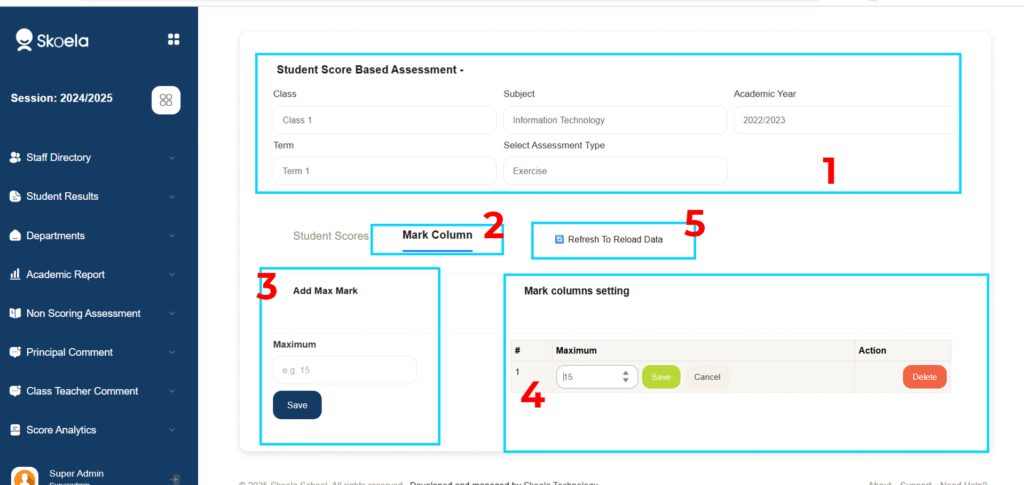
- Maximum Mark Configuration
- Select Assessment type
- Select the “Mark Column” tab
- Enter the maximum mark for the first assessment and click save
- You can edit the maximum mark by clicking on the maximum value in the table to show the edit form
- After edit click Save to update your maximum mark and recalculate scores
- When you feel data being stuck, click on “Refresh To Reload Data” to sync data
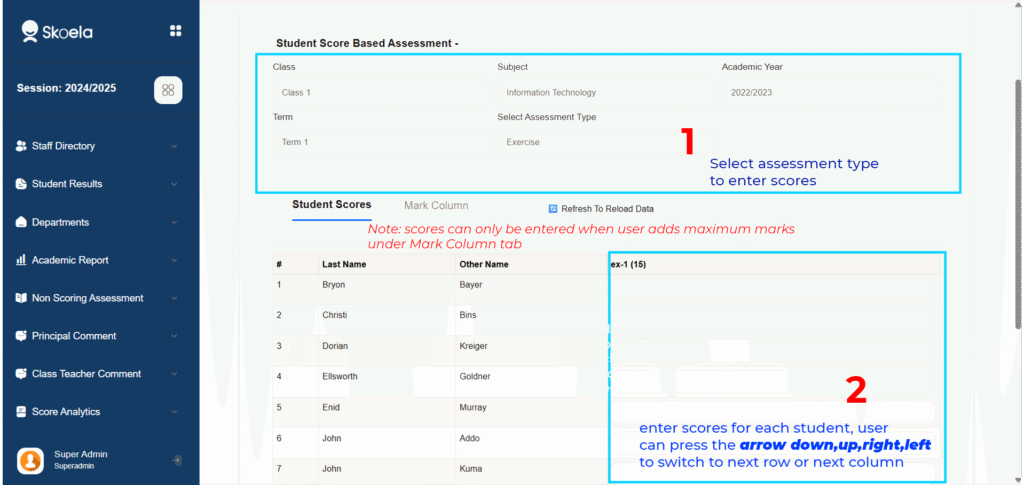
Entering Scores #
- Select Class, Academic Year, Term, Subject and Assessment type to show the score entry form
- Enter scores , scores automatically adjust to maximum mark if user enters a value more than the maximum mark
- Scores are autosaved when entered
- Use the arrow keys to move from rows and columns
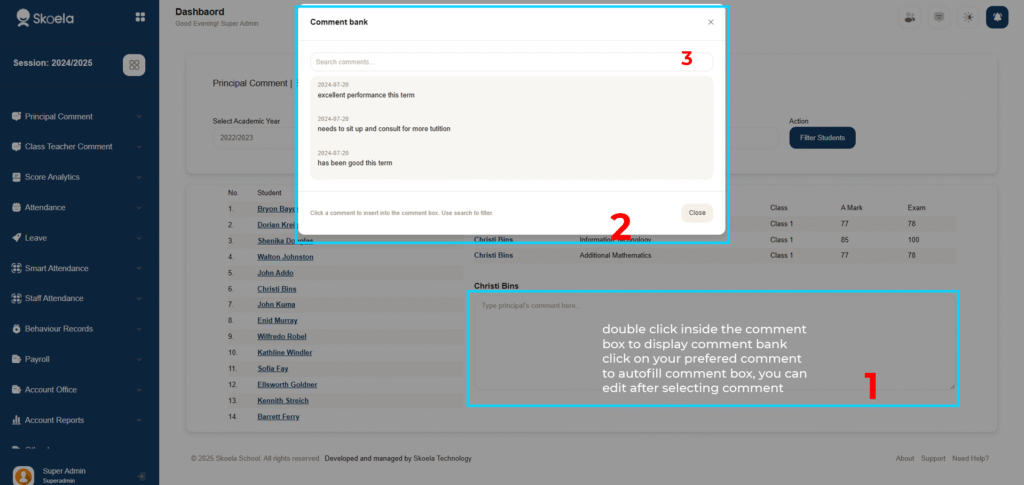
Principal, Class Teacher and Director’s Comment #
- Principal Comment can be found on the navigation
- Class Teacher Comment can also be found on the navigation
- Comment can either by typed by user or select the prebuilt comment bank for each student
- Click once in the comment box to type a custom comment
- Double click in the comment box to select the prebuilt comment bank( you can select the comment bank and thereby also modify the content
- Comment is autosaved
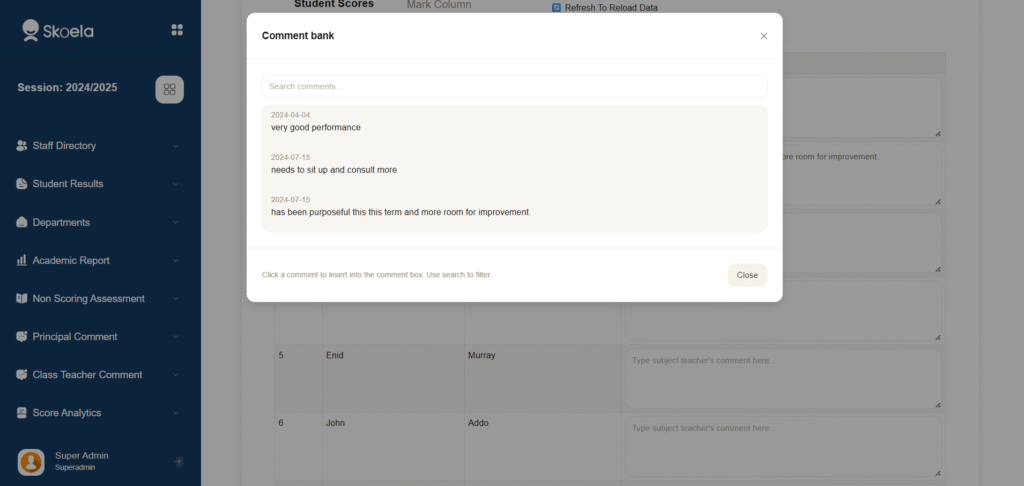
Subject Teacher Comment #
- Subject Teacher comment can be found on the scores page
- User needs to select assessment type “Comment” to show the comment box
- Click once in the comment box to type a custom comment
- Double click in the comment box to select the prebuilt comment bank( you can select the comment bank and thereby also modify the content.
- Comment is autosaved


