
Follow these steps to generate and print a balance sheet for a specific date range:
Step 1: Locate the Generate Report Option #
- Navigate to the sidebar menu or top navigation bar.
- Scroll down to find the Generate Report option.
Step 2: Access the Balance Sheet Section #
- Under Generate Report, select Balance Sheet.
Step 3: Select Start Date and End Date #
- A date picker for the Start Date will appear. Choose the desired start date.
- Another date picker for the End Date will appear. Select the desired end date.
Step 4: Generate the Report #
- Click on the Generate Report button.
- The system will display the balance sheet for the specified date range.
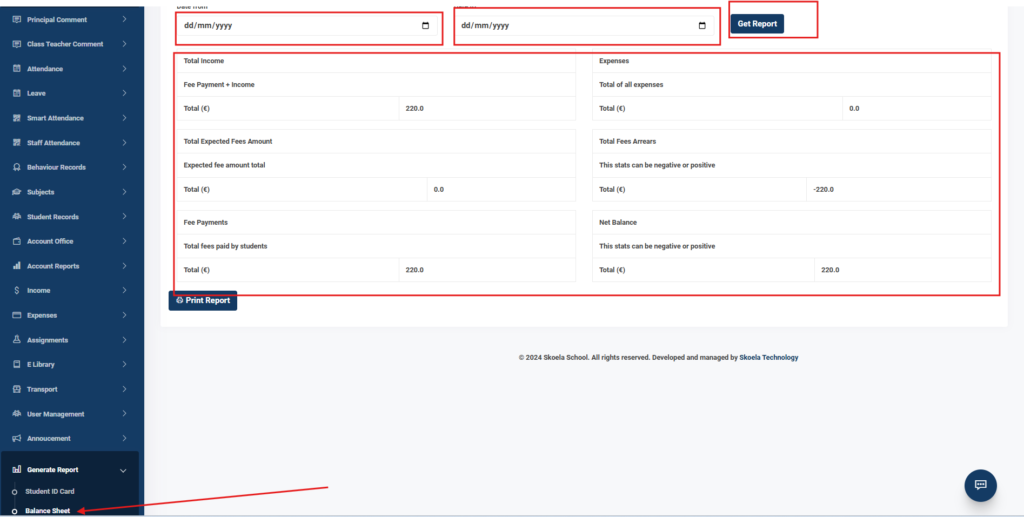
Step 5: Print the Balance Sheet #
- Review the displayed balance sheet to ensure accuracy.
- Use the print functionality provided on the page to print the balance sheet.
Ensure that you have selected the correct start and end dates to avoid errors in the generated balance sheet. For further assistance, contact the support team.


