Skip to content
Skoela Technology
Skoela Technology
  • Pricing
  • Book a Demo
  • Resources
    • Modules
    • Tutorials
    • Blog
  • Partners
    • Partner Schools
    • Partner Directory
    • Become a Partner
  • Services
Call
Book a Demo

Knowledgebase

Getting Started

  • How to check student information
  • How to update school profile
  • How to Manage Class Level
  • How to Manage Class
  • How to use smart attendance
  • How to manage students
  • How to manage term

User Management

  • How to update user profile

Staff Management

  • How to Manage Staff
  • How to manage department

Payment

  • How to collect bulk payment
  • How to Manage Payment Methods
  • How to Collect Payment

Fees

  • How to view student bill
  • How to Manage Fee Types
  • How to Manage Scholarships for Students
  • How to Set Fees

Academics

  • How to publish report
  • How to promote students to next class
  • How to Manage Academic
  • How to Manage Subject
  • How to set learning goals
  • How to Set Score Entry Deadlines
  • How to manage grades
  • How to Enter Scores

Notification

  • How to use the messages feature

Reports

  • How to check student results
  • How to generate academic calendar
  • Generating a Class Fee Report
  • Generating a Balance Sheet
  • How to generate student id card
View Categories
  • Home
  • Docs
  • Getting Started
  • How to manage students

How to manage students

< 1 min read

Manage Students

  • Create:
    1. Navigate to the Student Records section.
    2. Click “All Students”.
    3. A table with all students will be displayed
    4. Click on Create Student
    5. Fill in the details and click on submit
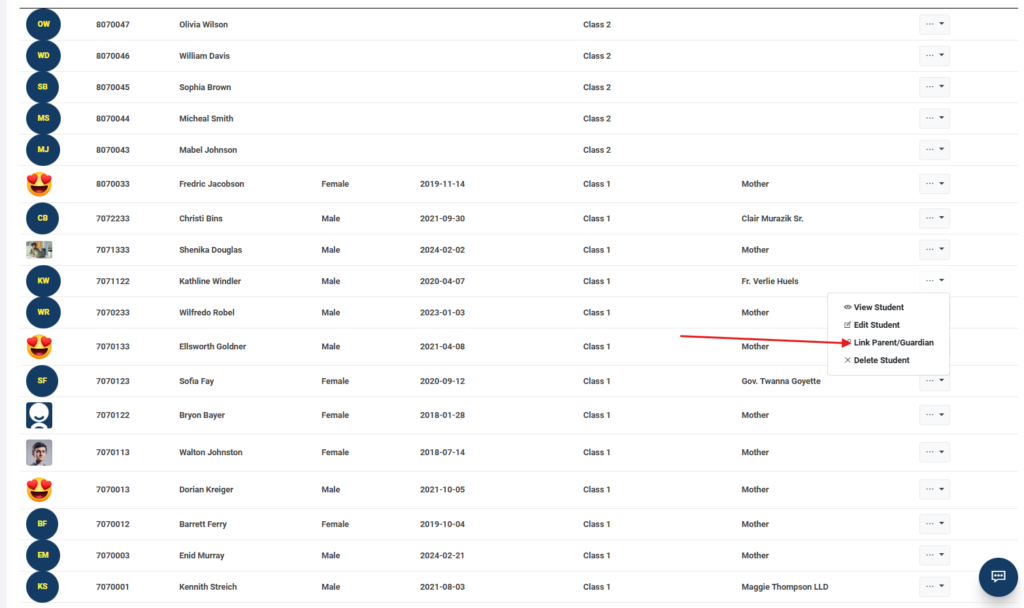
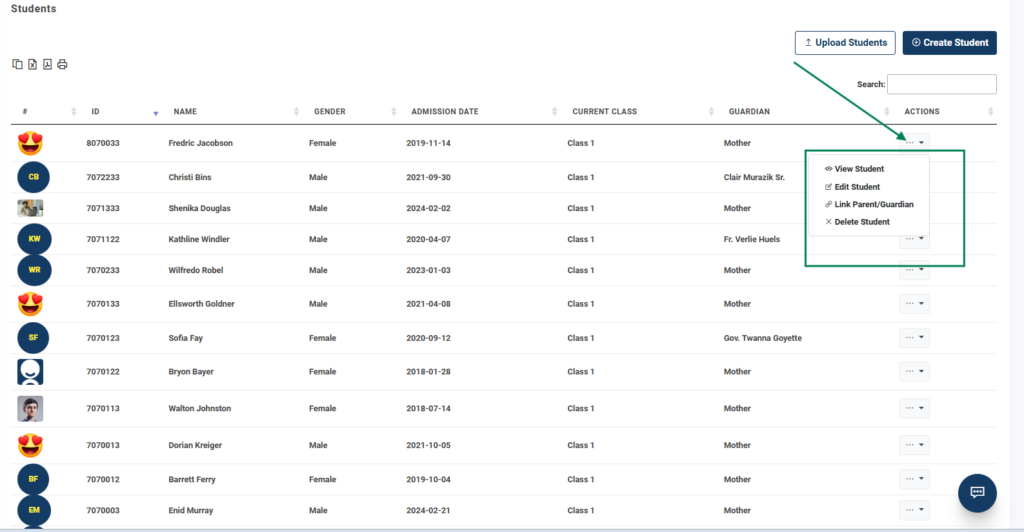
  • Actions:
  • Click on the horizontal dots beside each student.
  • This will display a dropdown of actions.
  • view student, edit student, link parent/guardian and delete student
  • Click on any link to perform an action

  • Bulk Upload:
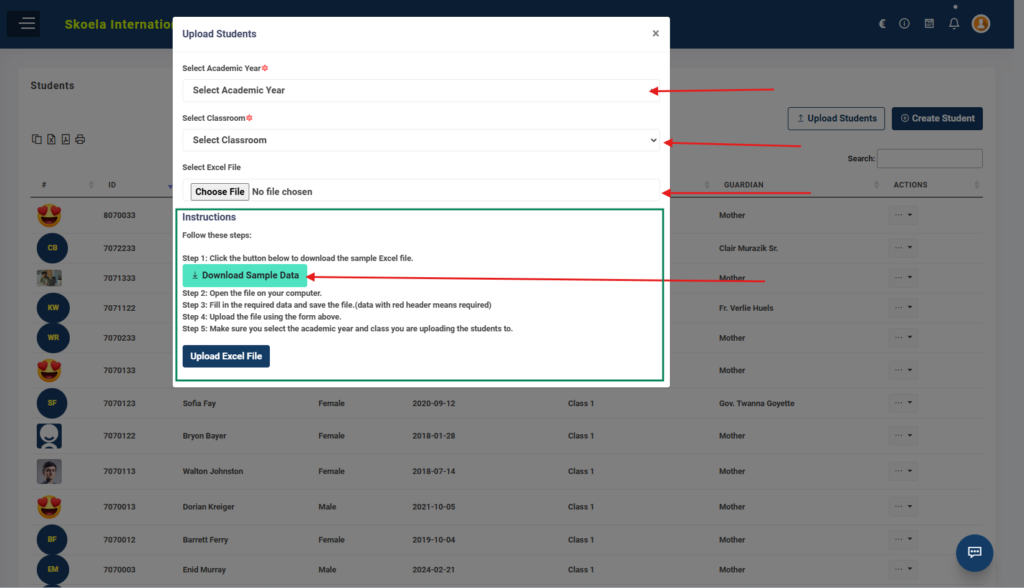
  • Click on “Upload Student” button.
  • A popup with a form will be displayed.
  • Click on “Download Sample Data”
  • Find the file on your computer and fill the details
  • Select academic year and classroom(to upload the student to the class and academic year).
  • Click on “Choose File” to upload your excel
  • Click on “Upload Excel File” to create bulk students

Student Parent

Click on the 3 horizonta dots under actions column

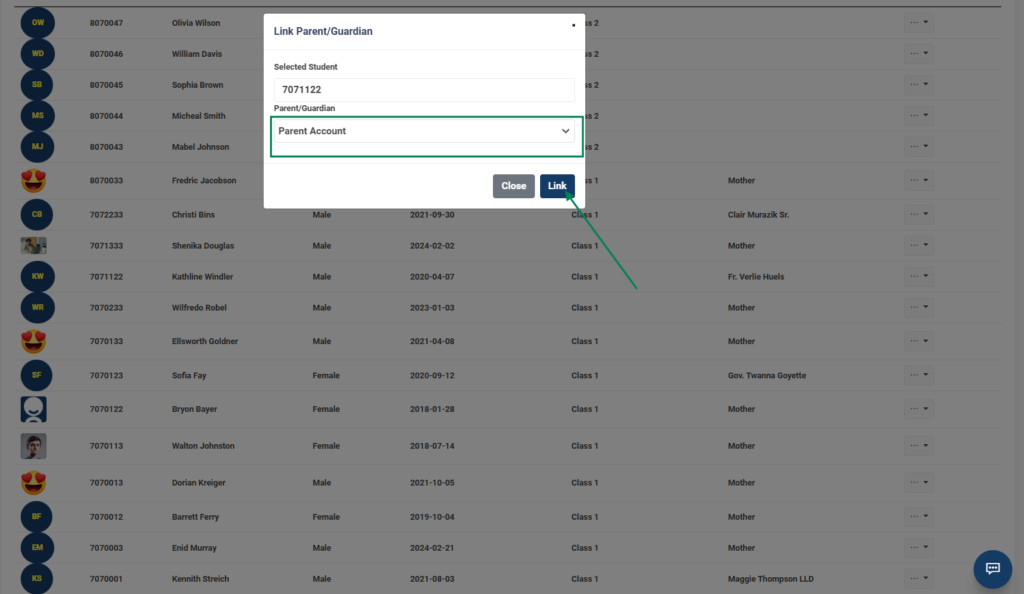
Select Link Parent/Guardian

A Popup will come

Follow the details to link parent to student

Select the respective parent to assign parent to student

Did this information help
Share This Article :
  • Facebook
  • X
  • LinkedIn
  • Pinterest
Still stuck? How can we help?

How can we help?

Updated on December 28, 2024
How to use smart attendance

Leave a Reply Cancel reply

Your email address will not be published. Required fields are marked *

Are you interested in working with us?

Schedule A Call Today
Skoela Technology
info@skoela.com
Navigation
  • Product
  • Pricing
  • Partners
  • Book a Demo
  • Blog
Helpful Links
  • Support
  • Documentation
  • Video Guide
Help Lines
  • +233-208-489575
  • Adenta, Accra, Ghana

© , Skoela Technology

  • Privacy policy
  • |
  • Terms & Conditions